Where to buy food photos?

For many, hiring a photographer for just a few shot of food photos may not be cost effective. Once good solution if you are on a tight budget is to buy photos from stock library. Stock photo library is a collection of readily available photos that are for sale. One of the downside of using photos from stock library is that you may not able to match the photos to your requirement.

Today, there are plenty of royalty free photos that you can find at stock library on a reasonable price. Although there are many photos offered by these international sites, one issue faced by local buyers is the limited number of Malaysian based content on these sites.Photostockit.com is one such site that offers photo for sale at competitive price. This stock photo site is very focused on Malaysian and Asian based content

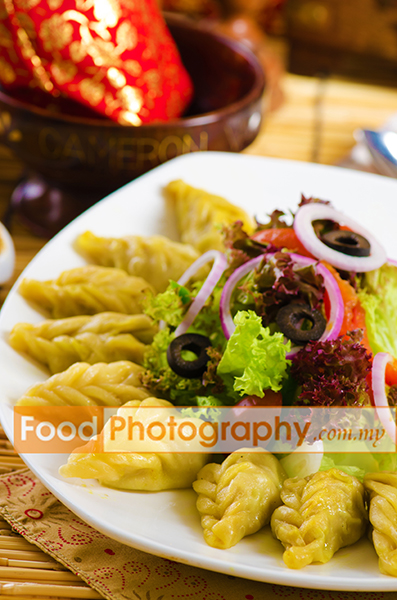
You will be able to find content ranging from Malaysia businessman to various types of popular Malaysian cuisines such as Nasi Lemak and et cetera.  There are currently near 10,000 royalty free photos on the site and it is increasing at steady pace.  Prices varies according to sizes with large size of 2721px costing RM30 while an extended license unlimited usage may cost up to RM 270.00. You will need to register to be able to buy the photos. Feel free to browse through food and drink photos for sale on the link below

http://www.photostockit.com/Food_Drink_g37.html

Do I require a food stylist ?

This one often the most asked question when I plan any shoot for my clients. Food styling is definitely one of the most important aspect of food photography. It is impossible to take good photos from a bad looking food.

There are a few scenarios to consider for food styling.

Establish restaurant

If you are an established fine dining restaurant with good experience on food styling, it would be the best for the foods to be styled by you or your chefs. This is because you have probably developed your signature food presentation and the photos would be representing your uniqueness. It is best to preserve this as during a photo shoot.

The case may not be true for traditional Asian based restaurants. As Asian foods traditionally do not emphasize on styling, it would be great to have a food stylist.

New restaurant 

Many new restaurants do not have experience in food styling especially when someone is new to the food industry. I would definitely recommended a food stylist if the budget is there.  You can establish the style for your food by following the recommendation by the food stylist. Food styling for restaurants should not be overly done as client’s expectation on the food served will be higher.

Fast Foods & Ice Creams

Fast foods especially those with buns can be quite a headache to shoot. Engaging a proper food stylist for these subject will let your photographer concentrate on photography.  It is almost impossible to get a solid ice cream without a food stylist. If you mind melty looking ice creams,  do consider getting a food stylist to make one.

Food recipe

A food stylist should be recommended if you are shooting  for cookbooks  or recipe. This will enable the best presentation for the foods.

Food photography lighting


Lights would definitely be one of the most important aspect in photography. We use only the best lights at  www.foodphotography.com.my. Profoto D1 is an example of lights that we used in our daily food photography session. These Sweedish made monolights are usually the preferred choice when it comes to professional photography.

What makes these lights really different than Chinese brands is the quality of light produced. Profoto is able to produce accurate color of the food that we shoot with very constant exposure. It has very short flash cycle duration Coupled with other lights modifiers, we are able to simulate a lot of different lightnings situation during a food photography session.

I will usually have a few of these lights with various power as backup purpose during a photography session. D1 comes with AIR remote and trigger that enables control remotely. I am now able to get rid of my old triggers and harness the full potential of AIR technology.  Aspects such as exposure, model lights and power can be adjusted with an AIR remote. Lights grouping can also be used with AIR technology. This is convenient as I do not have to get my assistant to be at each lights when adjustments are needed.

Lights modifier

Softboxes are great light modifiers and is one of the most preferred choice for me . Softbox has multiple layers of diffusers while the shape of the box made the lights very soft and even. Large softbox is able to produce very even lights while smaller one could be dramatic. I like to use a large octagon softbox as the main light while fine tuning all other lights along the way.
To be honest, there are no right or wrong with these lights as they can be used to produce different mood of lights.  A grid and snoot are great when I need some concentrated lights in certain areas in my food. Once a bluemoon, umbrella can be used to achieve harsher light effects. Filters are great if I need to blend some of the foods with the environment color temperatures.


Food Photography Preparation

This is a common question before any food photography session is commenced. Most experienced food stylist, restaurant owners and chef will know how to prepare before a food photography session. However some newly established restaurants or eateries are often chaotic in terms operation and food preparation especially when you do not have the budget for a food stylist

Here are some insights that will hopefully help anyone who are preparing for food photography session

Choose the best 

If you are cooking foods for photography, it would be common sense to choose the best looking materials to make the best looking foods. This is especially true for garnishing or background items. However in reality, you will be amazed on how many times I encountered clients who rushed to the nearest market during the photography session as the potatoes are just too awful to be photographed.

Prepare as early as possible

Plan earlier ahead before the shoot. With extra time gained, you can afford to shop around for the best looking materials before the shoot. Raw materials have to be prepared as early as possible provided the freshness is intact. Burger patties can be prepare way ahead while lettuce can be left overnight. Plan out and improvise for your own foods. The day of the photography can be quite intense with limited time.

Planning shoot order

Plan the order of foods to be shot. Ideally, the not so important food should start first while the signature food should be shot after two less important food. Do let your photographer knows which is the signature food to be shot so he or she can put more priority on it.

Extra is always better

Always prepare enough raw materials took cook extra foods. There are a lot of instances where the end result of the foods do not look good and cannot be used for food photography. Do expect recooking for some foods that do not turn out good.

Plan the style out

Before any photography, I will usually consult my client on style of the photography. This will very much depends on your requirements that may related to your design requirement. Mood board would be a great way to convey requirements.
Hopefully this can help out for anyone who are preparing for a food photography session.


Landscape and achitecture photography

Took me few trips and waited hours in the morning to get this shot

1. Shoot at the right hour.

Photography is always about lights and how it will set your subject. As a rule of thumb, always shoot when the sun is rising or setting. The lights during these hour is not harsh while the sun is low where it will create texture on the landscape. As a photographer, you will have to wake up earlier and shoot till late evening. It is tiring but sometimes worth the effort.


2. Composition.

Learn the art of composition. Try to be more serious when taking landscape photos. I find that often, most ametures simply shoot and run.


3. Use tripod.

Tripod is very important for landscape photography. By allowing your camera to be really still , you can allow more lights into the sensor and still have sharp images. This is important as the most beautiful hour of the day may be the very few minutes the sun sets or rises. You need stable camera to be able to absorb all the available lights.


Gadi Sagar shot in long exposure


4. Use longer exposure.

Be creative and use longer exposure. You can create movement of clouds, cars ,ocean and subjects in your photo


5. Use a CPL.

Circular polasizer is a must for landscape photographers. You can adjust it to get extra cold or warm tone. It is also very good to prevent glare on shining surface as well.  I love B+W CPL as they provide the best effect


6. Play with white balance.

Avoid using auto white balance when possible. Experiment a little with shady, cloudy or tungsten or other white balance. This will give different mode or effect on a photo

Everest North Face . Sometimes, luck plays a little. Many times you may have to wait days for the right weather.

7. Patience is virtue.

As a landscape photographer, you have no control over the weather. Somtimes you will have to wait for days of sunrise to photograph that mountain or famous landmark


8. Experiment with filters.


Graduated ND will reduce the contrast between the sky and land while colored filters will add effects and mood into the photo


9. Add something extra into the composition.

I find that somehow, if you add a little bit of tiny subject into a photo, it will introduce an entire new mood into the photo

Adding a fisherman creates mood.

10. Use trigger

Sometimes pressing your shutter may cause shake which may blur your photo. It would be good to use a trigger or even timer if you don’t have trigger during photography


K-tools Photostore review


K-tools is actually the company behind the Photostore product. Photostore is actually a website script that you can use to sell your photos online. It is somewhat different than other online galleries and Photosore is meant for full photo selling commercial use. Think about bypassing stock photo agencies and sell direct to your customers. You do not realy start a business untill you are the one who are receiving money directly from your customers.

Upon paying this product with Paypal, it actually takes a few hours for your order to get approved before you can download the script and install it into your webhosting.


Getting it Up and Running


This product comes with a free installation. However I choose to do it myself as I need to understand the product for future use. Installation wasn’t as easy as other PHP base products however it wasn’t so painful.

Getting this product fully running is quite a pain. Becareful with choosing your hosting as Photostore needs some customization and extra resources when running on shared hosting. Most of the time you will have to deal with your hosting support and Photostore support while you have to customize your own php.ini, if you have low technical knowlege and with plenty of money I would suggest you to rent Photostore instead from K-tools.

Do not host this product with Webhostingpad as I got my account temporary banned for high utilization from this script. I will be settling for a VPS soon

Getting everything in order may take weeks, you will have to setup your payment gateway and understand the product flows. The administration is not as simple as WordPress however is acceptable.


Features

Photostore is meant for real commercial purpose. You can set to sell your photos via suscription base or per download base.  You can set the currency and size of downloads which is pretty cool.  Your clients can register and download photos by it size after orders are being approved by you.

All pages template are ready so you can just overwrite it with your own words.


Support

Honest I’m a little bit unhappy with the support compared to other reviews that I have read from the Internet. Some tickets are unanswered for days and you are only allowed to raise 2 tickets at one time. I’m not really sure whether these tickets are being looked into and I do not get any new reply from it anymore. Possible this is what you get for buying 1 year support and the product for $249.00USD

There are also some flaw with this software however the response from support has been take it or leave it. Do expect reply such as “There’s nothing I can do with it” , “That is not an issue”

Most from the links from documentation are dead links which you will have to dig deep to find the documentation. There are plenty of issues which are not inside the documentation that you will require to raise ticket for it.

The latest version of Photostore is built with Smarty so you can fully customize the outlook of your store. However bear in mind that core code of Photostore is protected with IONCUBE so there are nothing much you can do if you are looking at modifying or upgrading some functions of Phototore.


If you are interested to look into this product

http://photostore.ktools.net/?aff=10362


Pro

  • Getting your store running in weeks!
  • Sufficient features to get your store running
  • Good pricing
  • Smarty Templating

Cons

  • Not an easy product to manage
  • Support response
  • Documentation does not cover everything


I bought this product at 20%  discount coupon that worked for me!

20pon

Selling Photos Online


Selling your photo has not been so much easier with internet. The best thing about stock photography is it’s a great passive and side source of income. Think about sleeping or doing your full time job while your photos are generating profit for you.  It’s great if you are looking at to capitalize your beautiful photos to money. Here are some  list of agencies for great stock photography  start up. Most of the agencies are free registration, however you may need a copy of your passport to activate your account.


Shutterstock

Shutterstock is one hell of an agency. It’s one of the best micro stock agencies out there.


Pros : Sells easily, beginner friendly where you get push of sales

Cons:  First ten initial review is tough (some tips shoot business people isolated in white to pass first 10)  , Shutterstock is getting fussier day by day

register


Dreamstime

Old timer agency , fair.


Pros: The thing is photos that don’t sell well on other agencies sells here. No reviews!

Cons:  Getting very fussy with photos. Do not submit almost similar photos as you will get rejection.

register


PantherMedia

An agency based in europe, fair

Pros: Earnings are in euro!

Cons : You have to pay 2USD to activate your account

register


Depositphotos

Fairly new agency, it used to pay people for approved photos. Not anymore

Pros: good for beginners

Cons: Not so much sales

register


Fotolia

Fotolia, no comment

Pros:  Pretty ok sales

Cons:  Very unfair agency

register


How to pass initial review on these agencies ?

There are easier acceptable photos , avoid submitting natures,landscape as they get hard to approve for the initial review unless they are really exceptional.  You can always submit them once you got your account reviewed. Here are some type of photos which I believe may get you trough easier.

  1. Shoot business people with studio lights and submit them with model release
  2. Shoot conceptual shot with creativity  with studio lights
  3. Shoot still life,products with studio lights
  4. Check for low noise. Zoom to 100% and clear up the noise
  5. Make sure photos are sharp